My grandmother instilled in me a love of homemade pie crust.
I remember her apron — blue and white checked like Dorothy’s dress in The Wizard of Oz — swinging to the rhythm of her rolling pin as she pressed out the crusts that she would fill with her rich, creamy fillings.
I dedicate this recipe to her.
Of course I’ve gone and adulterated all she taught me (that’s the nature of tradition, right?). If she were alive, I’d tell her that it’s because she took me blueberry picking in the woods and taught me to can surplus veggies. In doing so, she showed me the value of food in its most wholesome, nourishing form. Which is why my pie crust recipe doesn’t use white flour nor butter, the two main ingredients in a standard crust. While white flour and butter make a much more pliable and forgiving crust than what I’ve created, I’ve grown to recognize the value in working a bit harder to give my body what it needs.
One of the perils of working with whole wheat is its delicate nature. It doesn’t stretch like white flour and can be easily overmixed. But among the gifts you’ll find in a whole wheat crust are a heartier texture, a richer taste, and the benefits of taking in the whole form of wheat (which supports your ability to digest this beneficial grain).
I’ve included a few video tutorials of the steps so you can see the techniques in action.
Ayurvedic (un)recipe: Whole Wheat Ghee Pie Crust
1 ⅛ cup whole grain flour (wheat, einkorn, spelt. I have not tried gluten-free varieties, but I encourage you to play with it)
½ tsp. salt
6 TBSP ghee, chilled for at least one hour (Don’t skip the step of chilling the ghee — the dough will be stickier and won’t roll properly.)
3-6 TBSP ice water (put a few ice cubes in a glass of water and let it sit a few minutes)
Step 1:
Mix the salt and flour in a large bowl.
Step 2:
Cut the chilled ghee into 1-½ inch chunks, working quickly as ghee has a lower melting point than butter.

Step 3:
Using your fingers, massage the ghee into the flour until it is broken up and the flour resembles a thick cornmeal.
Step 4:
Add the ice water, one tablespoon at a time and gently draw the mixture together with your hands until it begins to take shape. Don’t overmix! Tip: Whole wheat flour needs a bit more moisture than white flour and the exact amount of water will depend on the humidity of your environment and flour.

Step 5:
Form into a ball and press into a disc. Cover and chill for at least one hour or overnight.
Step 6:
Generously flour a large working surface (I favor a clean countertop over a cutting board). Sprinkle some flour on top of the disc and begin rolling from the center toward the edges as if you were trying to touch each number on a clock. The crust should be quite thin and in an imperfectly even circle. You’ll know when you’re done by placing your pie dish on top of the dough — the circle should extend 2-3 inches from the edge of the dish. (Tip: If any holes appear as you roll, just pinch off some of the scraggly end pieces and press to fill them.)
Step 7:
With movements as gentle as if you were lifting up an angel wing, slowly caress the crust from the rolling surface, supporting the middle with your palms. Carefully place it in the pie dish, pressing down the inside edges with a light touch.
Step 8:
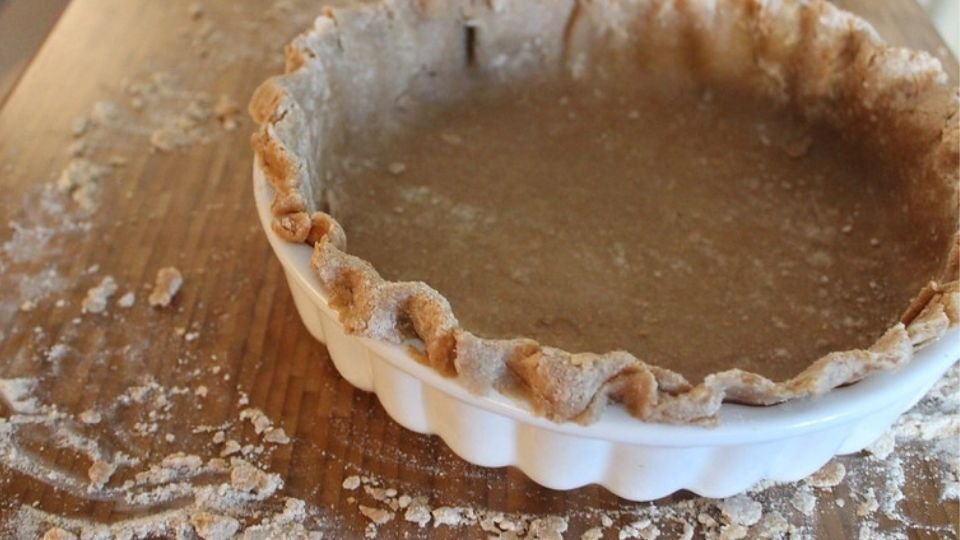
If you’ve rolled your crust to the right size, you’ll have an overhang with some scraggly edges. Fold them over and patch any thinner sections with the extra from the thicker areas. Then, either press down the edges with a fork or make a fluted crust by placing two fingers of your non-dominant hand on the inside of the crust and pressing the first knuckle of your index finger of your dominant hand in between them. See the video for the technique. Chill the crust for at least 30 minutes.
Step 9:
Remove the crust from the fridge and prick the inside with a fork. Bake at 425 F for 10-15 minutes, until the edges are just golden. Fill with your favorite sweet or savory foods and bake further as needed.

One final tip:
Learning a new technique is most nourishing when you allow yourself to mess up a few times. If your whole crust falls apart, press the pieces into your pie pan like a puzzle. After you’ve filled it, I promise everyone will be so busy enjoying the taste that they will never notice the difference.


